开源社区
开源社区
1.准备环境
1.1 获取文档资料
商品页https://www.iceasy.com/product/1874659379209633793 往下翻,找到3个文档,下载下来。
(1)硬件规格书
(2)用户手册
(3)原理图
1.2 准备IDE、烧录工具、demo
访问兆易创新官网,找到GD32VW5的资源https://www.gd32mcu.com/cn/download?kw=GD32VW5 ,下载以下软件。
IDE:GD32 Embedded Builder
烧录工具:GD32 All-In-One Programmer
demo:GD32VW553 Demo Suites
另外还要准备ch34x usb转TTL工具,安装ch34x驱动。
2.准备开发板
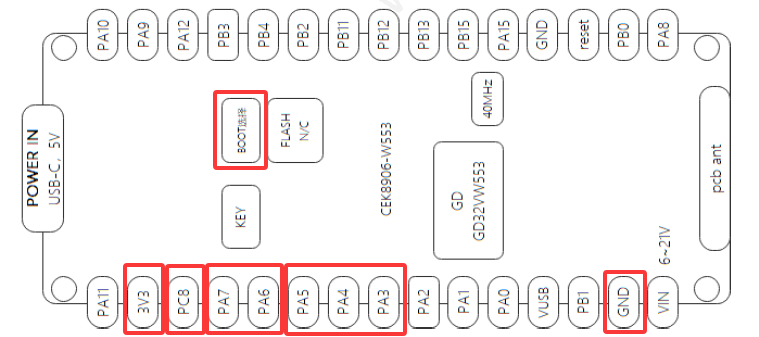
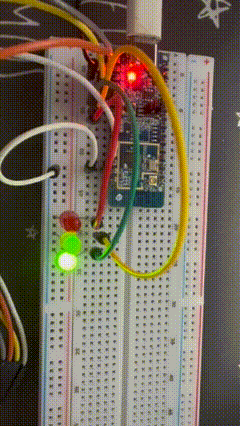
会用到这些引脚:
PC8:boot0切换启动模式。
PA7:RXD,接串口工具TXD。
PA6:TXD,接串口工具RXD。
PA3~PA5:分别接3个LED。
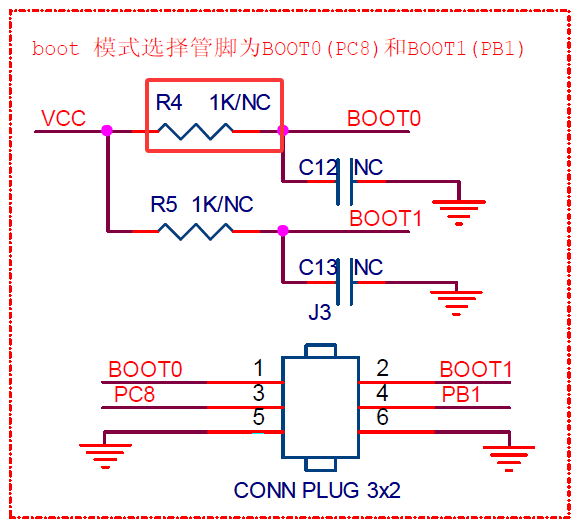
BOOT选择:注意有坑,看下面电路图,R4 1K/NC就是可以没有R4,实际拿到的板子是没有R4的,所以BOOT0上拉高电平要咱自己解决。
按下面的操作避免踩坑:
(1)按下图接线
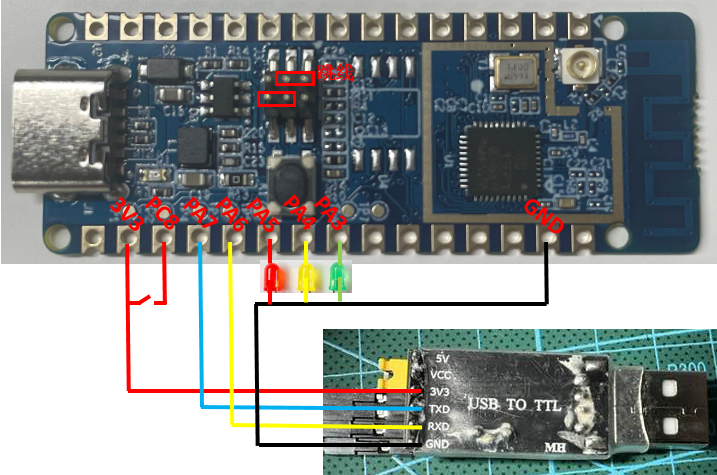
(2)PC8接3V3,按reset,bootloader启动,下载固件。
(3)PC8空,按reset,flash启动,运行固件。
参考:《用户手册》1.1引导配置。
3.编译demo
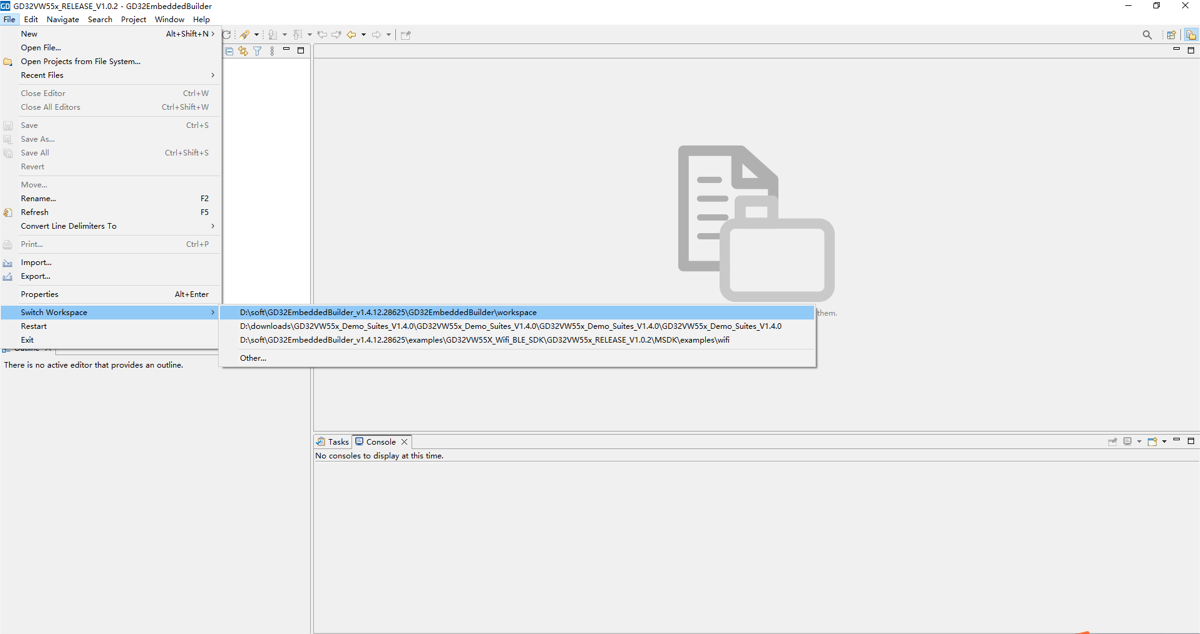
(1)打开GD32 Embedded Builder。
(2)找一个空目录,创建workspace(或选择之前建的workspace)。
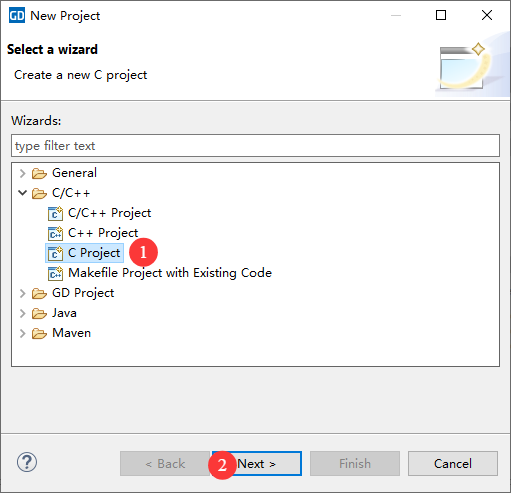
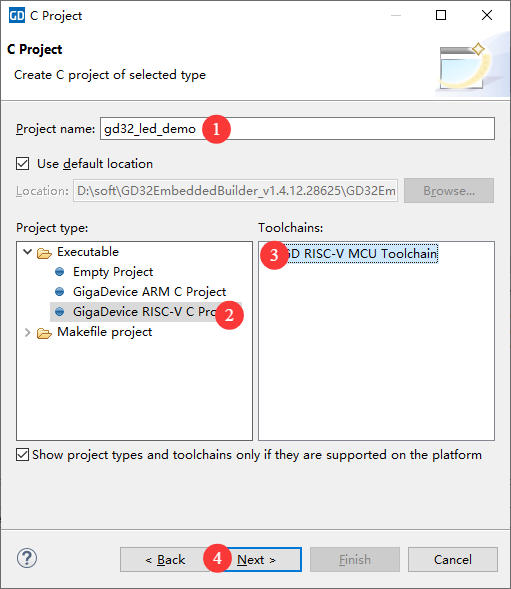
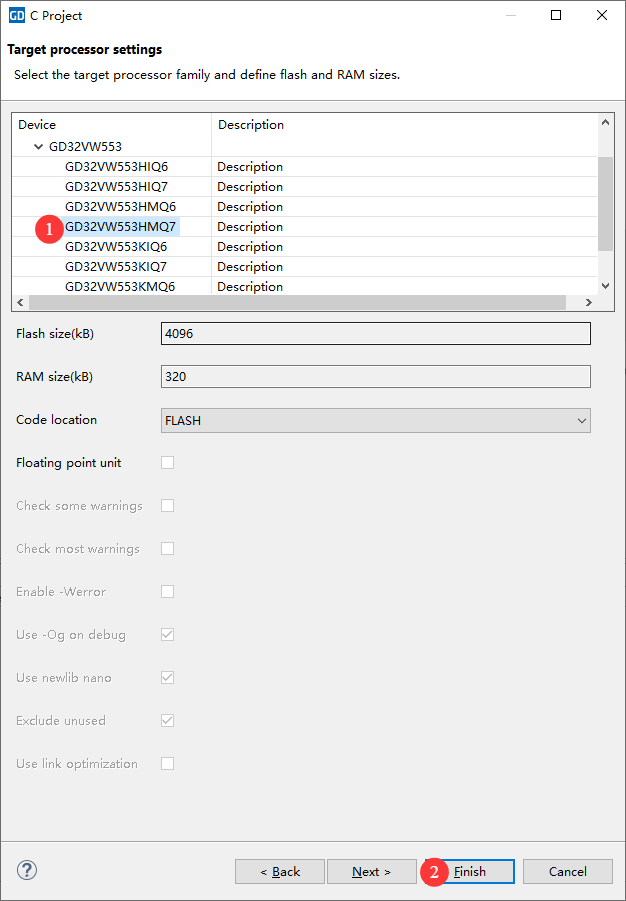
(3)创建项目
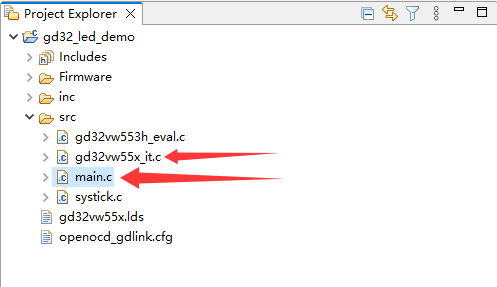
(4)改代码
下载官方demo《GD32VW55x_Demo_Suites_V1.4.0》,我要演示的demo代码路径GD32VW55x_Demo_Suites_V1.4.0\GD32VW55x_Demo_Suites_V1.4.0\GD32VW55x_Demo_Suites_V1.4.0\GD32VW553H_EVAL_Demo_Suites\Projects\01_GPIO_Running_LED,把它的代码拷到我们的项目中。这个demo实现了3个LED组成的流水灯。
修改我的工程中2个文件,gd32vw55x_it.c和main.c。
// gd32vw55x_it.c

/*!
    \file    gd32vw55x_it.c
    \brief   interrupt service routines

    \version 2024-07-29, V1.3.0, firmware for GD32VW55x
*/

/*
    Copyright (c) 2024, GigaDevice Semiconductor Inc.

    Redistribution and use in source and binary forms, with or without modification,
are permitted provided that the following conditions are met:

    1. Redistributions of source code must retain the above copyright notice, this
       list of conditions and the following disclaimer.
    2. Redistributions in binary form must reproduce the above copyright notice,
       this list of conditions and the following disclaimer in the documentation
       and/or other materials provided with the distribution.
    3. Neither the name of the copyright holder nor the names of its contributors
       may be used to endorse or promote products derived from this software without
       specific prior written permission.

    THIS SOFTWARE IS PROVIDED BY THE COPYRIGHT HOLDERS AND CONTRIBUTORS "AS IS"
AND ANY EXPRESS OR IMPLIED WARRANTIES, INCLUDING, BUT NOT LIMITED TO, THE IMPLIED
WARRANTIES OF MERCHANTABILITY AND FITNESS FOR A PARTICULAR PURPOSE ARE DISCLAIMED.
IN NO EVENT SHALL THE COPYRIGHT HOLDER OR CONTRIBUTORS BE LIABLE FOR ANY DIRECT,
INDIRECT, INCIDENTAL, SPECIAL, EXEMPLARY, OR CONSEQUENTIAL DAMAGES (INCLUDING, BUT
NOT LIMITED TO, PROCUREMENT OF SUBSTITUTE GOODS OR SERVICES; LOSS OF USE, DATA, OR
PROFITS; OR BUSINESS INTERRUPTION) HOWEVER CAUSED AND ON ANY THEORY OF LIABILITY,
WHETHER IN CONTRACT, STRICT LIABILITY, OR TORT (INCLUDING NEGLIGENCE OR OTHERWISE)
ARISING IN ANY WAY OUT OF THE USE OF THIS SOFTWARE, EVEN IF ADVISED OF THE POSSIBILITY
OF SUCH DAMAGE.
*/

#include "gd32vw55x_it.h"
#include "main.h"
#include "systick.h"

/*!
    \brief      core private timer handle function
    \param[in]  none
    \param[out] none
    \retval     none
*/
void eclic_mtip_handler(void)
{
    ECLIC_ClearPendingIRQ(CLIC_INT_TMR);
    delay_decrement();
}
// main.c
/*!
\file main.c
\brief led spark with systick, USART print and key example
\version 2024-07-29, V1.3.0, firmware for GD32VW55x
*/
/*
Copyright (c) 2024, GigaDevice Semiconductor Inc.
Redistribution and use in source and binary forms, with or without modification,
are permitted provided that the following conditions are met:
1. Redistributions of source code must retain the above copyright notice, this
list of conditions and the following disclaimer.
2. Redistributions in binary form must reproduce the above copyright notice,
this list of conditions and the following disclaimer in the documentation
and/or other materials provided with the distribution.
3. Neither the name of the copyright holder nor the names of its contributors
may be used to endorse or promote products derived from this software without
specific prior written permission.
THIS SOFTWARE IS PROVIDED BY THE COPYRIGHT HOLDERS AND CONTRIBUTORS "AS IS"
AND ANY EXPRESS OR IMPLIED WARRANTIES, INCLUDING, BUT NOT LIMITED TO, THE IMPLIED
WARRANTIES OF MERCHANTABILITY AND FITNESS FOR A PARTICULAR PURPOSE ARE DISCLAIMED.
IN NO EVENT SHALL THE COPYRIGHT HOLDER OR CONTRIBUTORS BE LIABLE FOR ANY DIRECT,
INDIRECT, INCIDENTAL, SPECIAL, EXEMPLARY, OR CONSEQUENTIAL DAMAGES (INCLUDING, BUT
NOT LIMITED TO, PROCUREMENT OF SUBSTITUTE GOODS OR SERVICES; LOSS OF USE, DATA, OR
PROFITS; OR BUSINESS INTERRUPTION) HOWEVER CAUSED AND ON ANY THEORY OF LIABILITY,
WHETHER IN CONTRACT, STRICT LIABILITY, OR TORT (INCLUDING NEGLIGENCE OR OTHERWISE)
ARISING IN ANY WAY OUT OF THE USE OF THIS SOFTWARE, EVEN IF ADVISED OF THE POSSIBILITY
OF SUCH DAMAGE.
*/
#include "gd32vw55x.h"
#include "systick.h"
#include <stdio.h>
#include "main.h"
#include "gd32vw553h_eval.h"
/*!
\brief main function
\param[in] none
\param[out] none
\retval none
*/
int main(void)
{
systick_config();
/* enable the LED clock */
rcu_periph_clock_enable(RCU_GPIOA);
/* configure LED GPIO port */
gpio_mode_set(GPIOA, GPIO_MODE_OUTPUT, GPIO_PUPD_NONE, GPIO_PIN_3 | GPIO_PIN_4 | GPIO_PIN_5);
/* reset LED GPIO pin */
gpio_bit_reset(GPIOA, GPIO_PIN_3 | GPIO_PIN_4 | GPIO_PIN_5);
while(1) {
/* turn on LED1, turn off LED3 */
gpio_bit_set(GPIOA, GPIO_PIN_3);
gpio_bit_reset(GPIOA, GPIO_PIN_5);
delay_1ms(500);
/* turn on LED2, turn off LED1 */
gpio_bit_set(GPIOA, GPIO_PIN_4);
gpio_bit_reset(GPIOA, GPIO_PIN_3);
delay_1ms(500);
/* turn on LED3, turn off LED2 */
gpio_bit_set(GPIOA, GPIO_PIN_5);
gpio_bit_reset(GPIOA, GPIO_PIN_4);
delay_1ms(500);
}
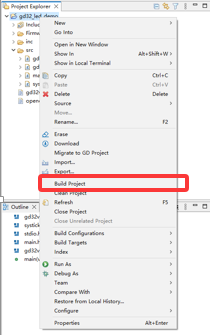
}(5)build project
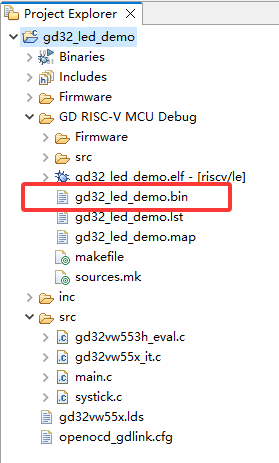
(6)获取固件
build成功后,固件在这里获取。
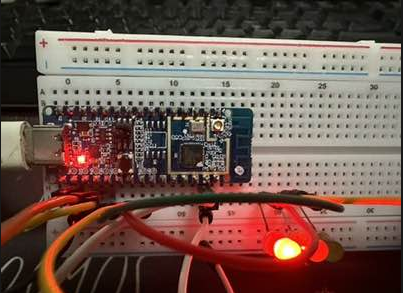
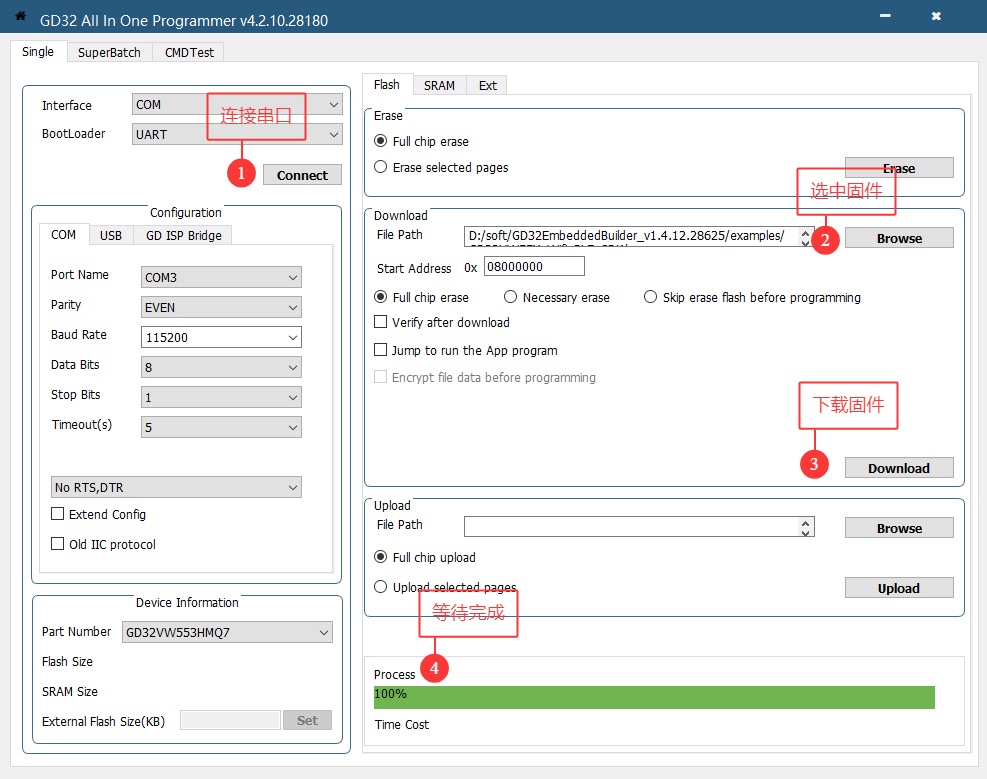
4.烧录固件
(1)将开发板通过USB转TTL接电脑。
(2)PC8接3V3,按reset。
(3)打开GD32 All-In-One Programmer。
(4)选择串口端口,Port Name下拉一般就一个,如果没有就试试重装串口驱动。
(5)连接串口,点connect。失败就检查一下步骤(2)PC8是否拉高电平,是否reset;串口端口是否被占。
(6)选择固件,点Browse,找到之前编译构建的bin文件。
(7)下载固件,点Download。
(8)等待完成。
5.演示
拔掉PC8接线,按reset重启。